
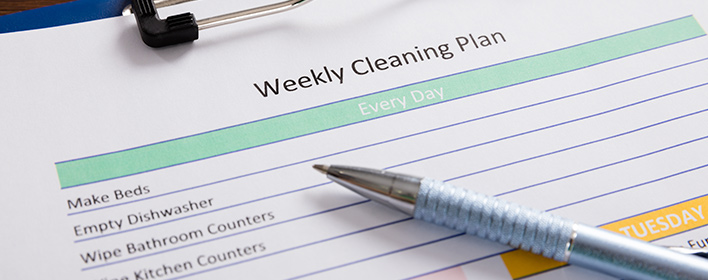
Complete House Cleaning Checklist
Nooks, crannies, corners and cobwebs. Oh, dear!
We admit it, house cleaning is a chore. This house cleaning checklist will get you on the right track.
We promise it’s possible to get it all done, but it does take a bit of
determination, focus, and time to make your house shine.
Why Make a Cleaning Schedule?
• No More Frantic Cleaning – Your house will be reasonably clean all the time if you stick to your cleaning schedule.
• Share Responsibilities – I usually end up doing all the cleaning in my house simply because I know what has been done and what needs to be done. If there is a posted schedule, people can be assigned tasks or pick up tasks that haven’t been done yet.
• Less Stress – When my house isn’t clean, I always feel as though I have something I should be doing, which makes it hard to relax. If I follow a schedule, I can relax once I have done everything on my checklist for the day.
• Greater Efficiency – If you don’t have your tasks planned out, time is wasted figuring out what to do. With a schedule, everything is mapped out for you to get started. Not only that, your schedule can be tailored to your family members’ strengths and availability.
• Fight Procrastination – I procrastinate cleaning for a variety of reasons, but being organized and having a cleaning schedule is one way for me to stop and overcome procrastination.
The 7 Steps to a Cleaning Schedule
1. Determine the length of your schedule
Before you begin to list out your tasks, you need to determine the length of your schedule. Will it be a weekly, biweekly, or monthly schedule? I suggest making a 4-week schedule because that way you are able to include tasks that you do daily as well as monthly tasks, such as checking your smoke detectors to protect your home in case of a house fire.
2. List your tasks
Make a list of everything that you can possibly think of that needs cleaning. Your list will probably vary from mine since we all have different homes and different needs.
3. Determine the frequency of tasks
To determine the frequency that you need to do a certain task, think about what makes sense and what is reasonable for you.
You may have some tasks that you only need to do once a year or a few times a year. For those tasks, assign them as fall or spring cleaning. Then spend a day in the fall and a day in the spring knocking out these tasks.
4. Get Help
If there are others living and breathing in the house with you, who are most certainly contributing to the mess, get them to help.
My favorite way to do this is to assign tasks to each child for a week at a time and rotate tasks. Don’t forget to throw in deep cleaning items, like the mess under the sink, or spraying down and wiping the trash compactor.
5. Use the Right Product for the Job
Use natural cleaning products if possible. We don’t use fancy products at our cleaning company but it’s important to use good quality, heavy-duty cleaning products that do a great job.
This doesn’t mean you have to spend a lot of money either. We use a solution of vinegar and water to damp mop linoleum or vinyl floors. It works great.
6. Dump your Junk
Get clutter-free. This is a hard one. The room will feel kind of bare at first, but trust me, you’ll get used to it (you’ll actually come to prefer it), and it makes clean up a breeze.